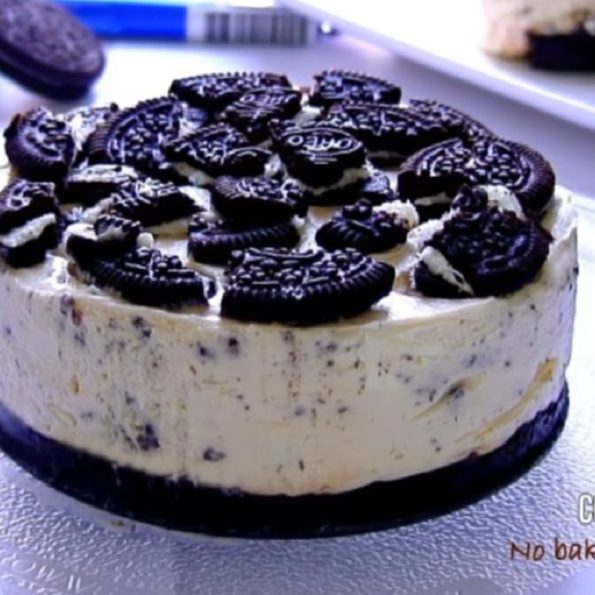
No Bake Oreo Cheesecake
This little cheesecake is easy to make and outrageously delicious. It is perfect to serve a family of four. But if you want a bigger cake, it's as simple as doubling the recipe. As one member said: "Eating this cake is like walking on clouds with a taste of heaven."
[wpinsertshortcodead id="pgypi60b189d6e468e"]
- 10 or more vanilla oreo cookies
- 2 tablespoons melted butter
- 100 grams cream cheese (at room temperature)
- 1/4 teaspoon vanilla extract
- 250 milliliters whipping cream
- 4 tablespoons Confectioner's Sugar
Add 8 Oreo cookies to a mixing bowl. Using the tip of a meat tenderizer or the tool of your choice, break them up so the resemble dry, crumbly sand. Add in 2 tbsp of melted butter. Mix it together until it resembles a wet sand. Add it to the bottom of a spring form pan and pack it down gently using a spatula.
Add the whipping cream to a mixing bowl. Using a whisk or electric mixer, beat it until it doubles in volume and peaks form. This should take about 3 to 5 minutes. Set it aside in the fridge or in a cool place. Make sure the whipping cream is chilled before using it.
Put the cream cheese in another mixing bowl. Add in the confectioners sugar and the vanilla extract. Mix until it’s well combined and creamy. Add the whipped cream to the cream cheese mixture and beat it together.
Break up the other 2 Oreo cookies into tiny bits and fold them into the mixture.
Add the cream cheese mixture into the spring form pan so it comes to the top. Smooth it out with a spatula and top it with bits of Oreo cookies.
Place it in the fridge and chill until it’s set. This should take 5 to 6 hours but overnight is preferred. You can also set it aside in the freezer to have an ice cream consistency. Serve and enjoy your no bake Oreo cheesecake.
Serving Size 1
Servings 4
- Amount Per Serving
- Calories 645kcal
- % Daily Value *
- Total Fat 44g68%
- Saturated Fat 23g115%
- Cholesterol 108mg36%
- Total Carbohydrate 57g19%
- Sugars 41g
- Protein 7g15%
* Percent Daily Values are based on a 2,000 calorie diet. Your daily value may be higher or lower depending on your calorie needs. Nutritional values are a within reason estimate and my vary depending on several factors.
As always, there are a few tips to making this tasty no bake cheesecake. First, make sure the cream cheese is at room temperature. If it’s chilled, it will be just about impossible to work with. You should use real whipping cream and not all purpose cream in this recipe. If you have to use all purpose cream, make sure it is well chilled. I put it in the freezer for 1/2 an hour to an hour just to be sure.
The recipe calls for vanilla Oreo cookies. If you a fan of chocolate Oreos, you can use them, as well. I find it’s best to let the cheesecake set in the fridge overnight; although, you can get away with a few hours. It’s even quite nice in the freezer, as it takes on the texture of ice cream. This recipe makes enough to fill a 5 inch spring form pan. It does give you a little extra filling, however. In light of this, you may want to make up another little cake.